
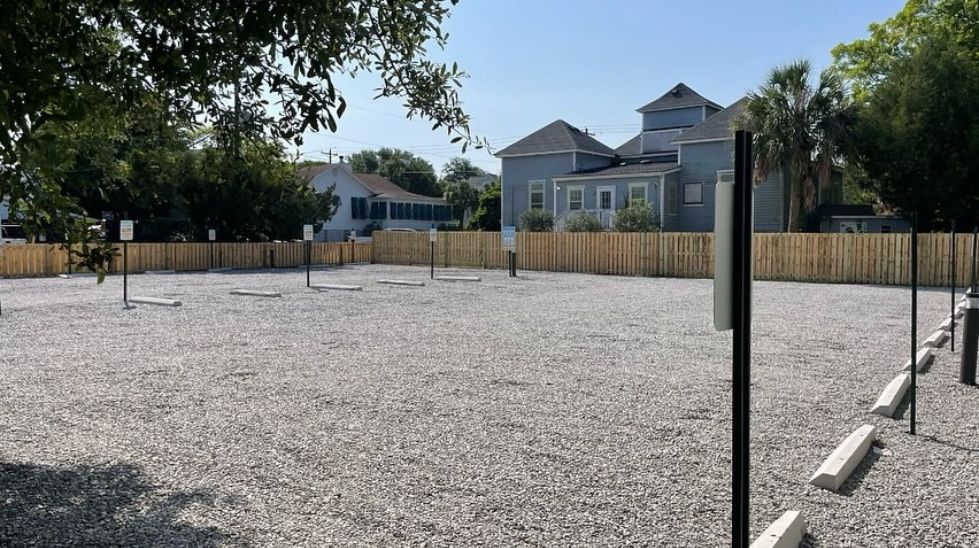
Before a single wall goes up or a foundation is poured, the ground beneath a construction project has to be ready. Construction grading is the process that makes that happen — and when it’s done right, everything else on the site can proceed on schedule and on budget. When it’s done wrong, the consequences can be costly, time-consuming, and sometimes structural.
Whether you’re a homeowner planning a residential build or a developer managing a large commercial development, understanding how construction grading works — and why each step matters — can help you make smarter decisions and set your project up for success.
This guide walks through the full process from start to finish, including the most common mistakes that derail projects and why hiring an experienced grading contractor matters.
What Is Construction Grading?
Construction grading is the process of reshaping, leveling, and shaping land to meet the specific requirements of a building project. It involves moving, compacting, and contouring soil to achieve the elevations and slopes called for in a site plan.
Grading serves multiple functions. It creates a stable, level surface for construction, directs water runoff away from structures, reduces erosion risk, and establishes the proper elevations for roads, parking areas, drainage systems, and building pads.
Without proper grading, even a well-designed structure can experience drainage problems, settling, and foundation issues down the line. It’s one of the most important — and most underappreciated — phases of any construction project.
Why Construction Grading Matters Before Building Begins
Grading happens early in the construction timeline for a reason: almost everything else depends on it. Here’s why it can’t be skipped or rushed:
- Foundation stability: Buildings need a stable base. Improperly graded soil can shift, settle unevenly, or erode beneath a foundation — leading to cracks, structural damage, and expensive repairs.
- Drainage control: Water always flows downhill. Grading determines where water goes after a rain event. If it flows toward the building instead of away from it, you’re looking at basement flooding, foundation erosion, and ongoing moisture problems.
- Erosion prevention: Loose or unstable soil on an ungraded site can wash away quickly, particularly during heavy rainfall. Proper grading combined with erosion controls keeps the site intact through the construction process.
- Regulatory compliance: Local municipalities typically require grading plans and inspections as part of the permitting process. Getting this right upfront prevents project delays.
At Johnston Construction, we’ve seen firsthand what happens when grading is treated as an afterthought. Our team prioritizes getting the site right from the beginning so builders and property owners can move forward with confidence.
Step 1: Evaluate Site Conditions and Topography
Every grading project starts with a thorough assessment of existing site conditions. Before any equipment moves onto the property, your grading contractor needs to understand what they’re working with.
This evaluation typically includes:
- Reviewing topographic surveys and site maps to understand current elevations and natural drainage patterns
- Assessing soil type and composition — clay-heavy soils behave very differently from sandy or loamy soils under equipment and load
- Identifying any underground utilities, easements, or environmental constraints that could affect grading work
- Evaluating existing vegetation, tree root systems, and any structures to be removed or preserved
- Noting areas prone to ponding, erosion, or poor drainage
This initial assessment shapes every decision that follows. Skipping it — or relying on assumptions instead of actual data — is one of the most common reasons grading projects run into trouble.
Step 2: Create a Detailed Grading Plan
With site conditions documented, the next step is developing a detailed grading plan. This plan is typically prepared by a civil engineer or site designer in coordination with the grading contractor and includes:
- Proposed finish elevations for all areas of the site
- Cut and fill quantities (how much soil needs to be removed versus added)
- Drainage patterns, swales, and retention features
- Slopes and gradients for roads, parking areas, and building pads
- Erosion and sediment control measures
A good grading plan balances cut and fill volumes as closely as possible to minimize hauling costs. It also accounts for soil compaction factors — soil that’s been excavated and replaced will settle differently than undisturbed native soil.
Before work begins, this plan needs to be reviewed, approved, and permitted through the appropriate local authority. In the North Charleston area, this typically involves working with Berkeley, Charleston, or Dorchester County, depending on the project location.
Step 3: Clear and Prepare the Construction Site
With the grading plan approved, it’s time to prepare the site for actual grading work. Site preparation involves:
- Vegetation removal: Trees, shrubs, brush, and ground cover are cleared from the grading area. Stumps and root systems must be fully removed to prevent voids from forming under filled areas.
- Topsoil stripping: The uppermost layer of topsoil — typically 4 to 12 inches — is stripped and stockpiled for later use in finish grading. This organic-rich layer isn’t suitable as structural fill but is valuable for final landscaping and revegetation.
- Demolition coordination: If existing structures need to come down before grading can begin, demolition is sequenced to clear the way. This is especially important on infill lots and redevelopment sites.
Refer to our construction site preparation checklist for a full breakdown of what needs to happen before grading equipment arrives on site.
Step 4: Perform Rough Grading
Rough grading is the heavy-lifting phase of the process. This is where significant amounts of soil are moved to bring the site to approximate design elevations. Equipment commonly used in rough grading includes bulldozers, motor graders, scrapers, and excavators.
During rough grading, contractors:
- Cut areas that are too high, removing excess material to reach target elevations
- Fill low areas using material from on-site cuts or imported fill material
- Begin forming the basic shape of the site — pads, slopes, roadways, and retention areas
- Leave the surface slightly above the final grade to account for compaction and settling
Rough grading typically brings the site within 0.1 to 0.5 feet of finished grade. Fine grading later brings everything to precise specification.
Johnston Construction performs rough grading for both residential and commercial properties throughout the Tri-County area, using equipment suited to the scale of each project to keep timelines on track.
Step 5: Install Drainage Features and Erosion Controls
Drainage infrastructure and erosion controls are typically installed during or immediately following rough grading — not at the end of the project.
Drainage features commonly installed at this stage include:
- Drainage swales and channels to direct runoff away from structures
- Detention and retention ponds
- Culverts and storm drain pipe systems
- French drains and perforated pipe systems for subsurface drainage
- Water retention areas and bioretention cells
Erosion and sediment controls include:
- Silt fences along the site perimeter and near water features
- Erosion control blankets on slopes and disturbed areas
- Inlet protection devices around storm drains
- Stabilized construction entrances to reduce sediment tracking
- Temporary seeding or mulching on exposed soil
These measures aren’t optional — they’re required by the South Carolina NPDES construction general permit for sites disturbing one or more acres. Installing them early protects the site during the remainder of construction and helps avoid regulatory fines.
Step 6: Compact Soil and Verify Elevations
Soil compaction is a critical step that’s easy to overlook and hard to fix after the fact. Fill material must be compacted in controlled lifts — typically 6 to 12 inches at a time — using appropriate compaction equipment. Proper compaction:
- Eliminates air voids that could cause settling under load
- Increases soil strength and bearing capacity
- Reduces future erosion potential
- Ensures the site can support the weight of structures, vehicles, and equipment
Compaction is typically verified using nuclear density gauges or dynamic cone penetrometers. Required compaction levels vary by application — structural fills under buildings typically need to reach 95% of maximum dry density, while fills under parking areas may have different specifications.
Elevation verification runs parallel to compaction. Surveyors or GPS-equipped equipment check that the site is hitting target grades within allowable tolerances. Any areas that are off — whether high or low — are addressed before moving forward.
Step 7: Complete Final Grading
Final grading, also called fine grading, brings the site to precise finished elevations. This phase uses smaller, more precise equipment — typically small dozers, skid steers, and laser-guided grading equipment — to achieve the tight tolerances required for finished surfaces.
Final grading work includes:
- Achieving specified slopes around building pads and structures to direct water away from foundations
- Grading roadway and parking lot subgrades to accept paving
- Establishing final elevations for landscaped areas
- Placing and spreading topsoil stockpiled during site clearing
- Preparing areas for seeding, sodding, or final landscaping treatments
After final grading is complete and inspections are passed, the site is ready for foundation work, paving, and other construction activities to begin.
Common Construction Grading Mistakes to Avoid
Even experienced builders can run into grading problems. Here are the most common mistakes — and how to avoid them:
1. Not accounting for soil settlement
Fill material always settles over time. If settlement isn’t factored into the grading plan, you’ll end up with low spots and drainage problems once construction is complete.
2. Inadequate compaction testing
Skipping or reducing compaction testing to save time can lead to structural failures. Always verify compaction at every lift.
3. Poor drainage planning
Flat sites and sites that drain toward structures are ticking time bombs. Every grading plan needs positive drainage — typically a minimum 2% slope — away from all buildings.
4. Disturbing too much area at once
Exposing large areas of bare soil during rainy seasons dramatically increases erosion and sediment runoff risk. Phase the work and install erosion controls aggressively.
5. Ignoring existing utility locations
Cutting through an underground utility line causes project delays, safety hazards, and costly repairs. Always call 811 before digging and review utility records as part of site assessment.
6. Rushing the process
Grading done under pressure to meet schedule is grading done wrong. The time saved by cutting corners always costs more in the long run.
Why Hiring an Experienced Grading Contractor Matters
Construction grading services look deceptively simple — it’s just moving dirt, right? In reality, it requires a deep understanding of soil science, hydrology, equipment operation, survey interpretation, and local regulatory requirements.
An experienced grading contractor brings:
- Knowledge of local soil conditions and how they behave during different seasons
- Familiarity with regional permitting requirements and inspection standards
- Properly maintained equipment appropriate to the project scale
- Relationships with engineers, surveyors, and inspectors that keep projects moving
- A track record of completing projects on time and within budget
Johnston Construction was founded in 2021 by brothers William and Edward Johnston on a foundation of integrity and lasting relationships. Based in the Lowcountry and serving the Tri-County area, our team specializes in mass grading and excavation for residential and commercial projects of all sizes.
If you’re planning a project that needs professional construction grading in North Charleston, SC, or anywhere in the Tri-County region, we’d be glad to discuss your site and what it needs. Contact us to request a quote and get started.
Frequently Asked Questions
Construction grading is the process of reshaping and leveling land to meet project specifications, improve drainage, and create a stable foundation for construction.
Proper grading helps prevent drainage problems, erosion, foundation settlement, and other site-related issues that can impact a project’s success.
Excavation involves removing soil, rock, or other materials from a site, while grading focuses on shaping and leveling the land to achieve specific elevations and slopes.
Project timelines vary based on site size, soil conditions, weather, and grading complexity. Small residential projects may take a few days, while larger developments may require several weeks.
Poor grading can lead to standing water, erosion, foundation damage, and costly repairs. Proper drainage planning is a critical part of every grading project.